Welcome, Bienvenidos!

Showing posts with label outdoor mosaic. Show all posts

Artful Oasis

The finished mural with a few photo edits :)

After blending out some of the palm tree on the yellow area and color adjusting.


Before photo editing. Early morning was the best time to finish the edges, but the light was in a lot of shadow.  The mosaic mural was centered over the pool.  Their landscaper put the palm trees on either side after the installation.

Rich Red Abstract Mosaic

Went glass shopping at Expressions Glass and I am working on this vibrant colored stained glass mosaic. It's large 6' x 2.5' for an exterior pool area. I will be posting stages in the creation of this mosaic from design to completion and installation.

Had to clear out and reorganize the studio, which was a good thing.
In fact, I'll be having a small online studio sale to find loving homes for a few pieces of art in a variety of media :)

Hand colored full size cartoon, ready to use


Coloring the bulk/Wht banner print out for color matching and because I like to color!
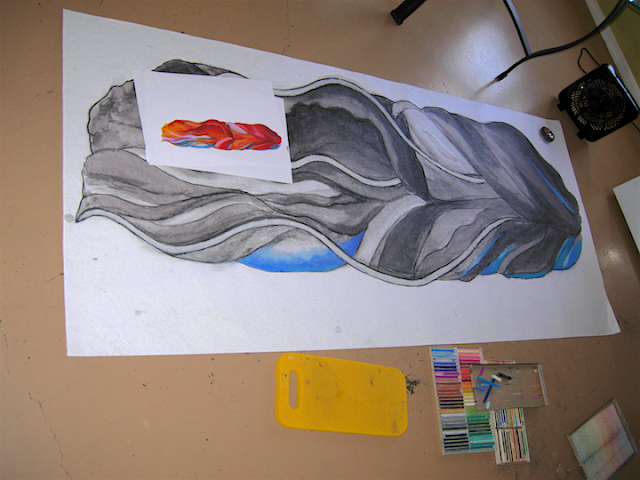
Used an old set of pastels to color the 6' x 2.5' print out.


Original art proposed for pool site. Changed to current curves.


It will be mosaics of stained glass in rich colors inspired by Georgia O' Keefe.
Also, working another mosaic that I am designing for a friend. She will be fabricating it in tile. It's super cool, I love it and will do a separate post for it.


Custom Mosaic Address Plaque - finished!

Glass and ceramic tile custom mosaic address plaque Finished  :)
Below are the steps for reverse indirect technique used in this project.
Address Plaque by  Sue Betanzos Designs

Layout your design with clear contact paper, sticky side up to prevent pieces from moving when placed.

All laid out according to the design. Vermillion Flycatcher with prickly pear and bee.


Firmly apply/adhere mosaic tile tape to the surface. A heavy grade clear tape for mosaics. 


Carefully flip the mosaic. Now the backside is ready for a thin coat of grout and cement. The grout will fill from the back for an even front surface and prevent cement from seeping through.

Butter the substrate (1/2" Wedi board) and a very thin coat on top of the pre-grout. This ensures complete adhesion of all tiles for a firm bond. Vital for outdoor pieces to withstand weather.

Center and Seat the substrate onto the prepped area. This is already on a heavy cardboard bottom. Put another firm board on top to sandwich and flip so now the right side of the mosaic will be on top.

With a tile float, press the tiles to make sure all is bonded. Then let the cement and tile cure a few hours (depending on air moisture/environment).  Use the container the cement was mixed in to test the hardness of the cement as it cures.
When it has hardened to very firm clay, Carefully test a corner of the mosaic film for tile adhesion. The tiles should remain in place.  Gently begin peeling the film at right angle (Not straight up which can pull pieces off since the cement is not hardened).  


Once tile tape has been removed start cleaning excess grout with toothbrush, brushing off excess. The grout should be at the point where it can still be removed from the surface as it begins to harden more.


Certain areas will need more filing if the mosaic is mixed media, such as this one. Plus the edges and bottom still need finishing.


The sides are finished with tile and a touch of silver chain added to the bottom to complement the mirror accents. Last step, grout the edges and the chain, clean and polish. Let it cure for a few days. Cement and grout will continue hardening for 10 - 15 days depending on moisture environment (especially the cement).

This address plaque is ready to hang. It can also be done without hangers for direct permanent application on a surface.
(hangers were applied onto the Wedi board Before mosaic was assembled)